Steps to illustrating "The Harbor Light."

STEP ONE - Rough Thumbnail Sketches
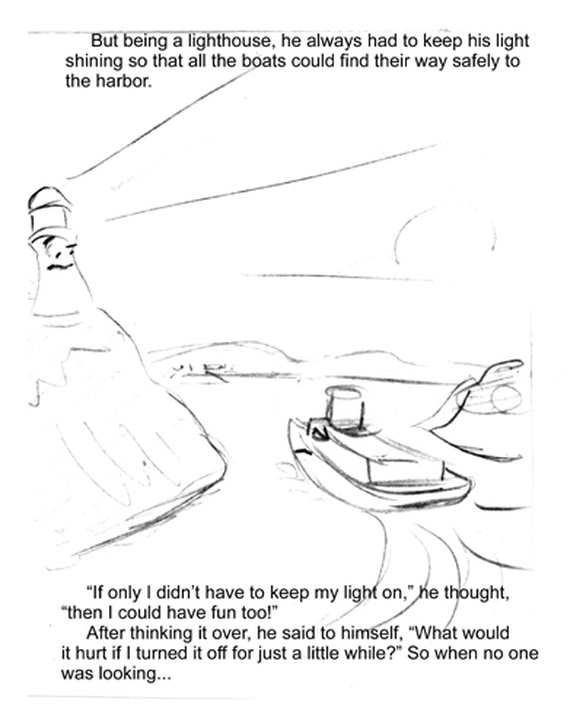
After writing the story, I began to sketch out my ideas for the illustrations. For each page, I would make small, quick sketches which allowed me to try out various ways to tell the story in pictures without spending the extra time that more fully crafted drawings would take. And since each page has to be designed for the text and drawings to work together, I would sometimes revise the text based on my illustration ideas.
As I worked on these rough sketches, I would pin the small drawings on to a bulletin board, placing them in order with the corresponding text below it. This way, I could see how all the pages would work together, and make necessary changes where things didn't flow well.
I then scanned the small rough sketches into the computer, enlarged them to full size, placed the text where I wanted it to go on each page, then printed out and assembled the pages into a "dummy" book. This way, I could see a rough representation of the actual size book and make more adjustments if needed.

STEP TWO - Final Pencil Drawing
Once the book was worked out in quick rough form, I now could go in and spend the time necessary in making a nice final visual. Using the rough sketches as a guide, I first drew the full size illustrations with a blue pencil, loosely working out the characters, background, and overall design of each page. Then when I was happy with the blue sketches, I drew over them with a graphite pencil, making the final lines that would be seen in the final illustration.
Once the book was worked out in quick rough form, I now could go in and spend the time necessary in making a nice final visual. Using the rough sketches as a guide, I first drew the full size illustrations with a blue pencil, loosely working out the characters, background, and overall design of each page. Then when I was happy with the blue sketches, I drew over them with a graphite pencil, making the final lines that would be seen in the final illustration.

STEP THREE - Final Color Illustration
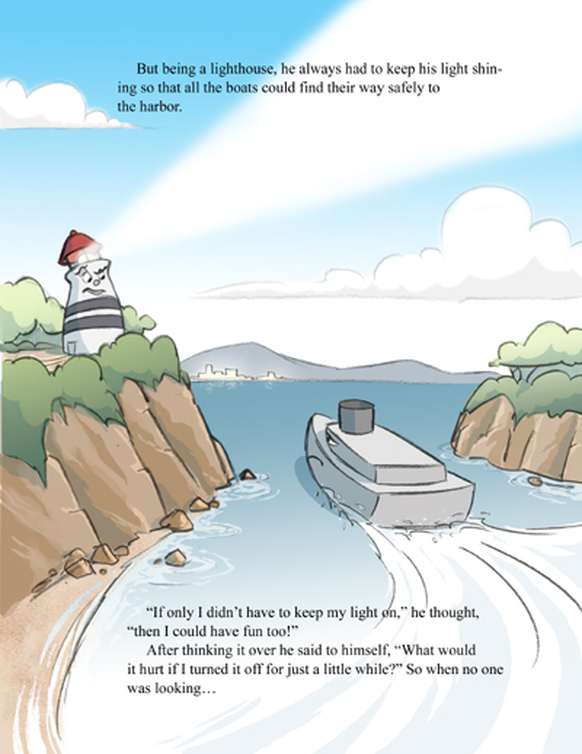
With the final drawings completed, I scanned in each page and moved on to the coloring stage. Using Adobe Photoshop, I first removed the under drawing of blue, leaving only the graphite visible. Next I began adding color, and was able to experiment with an endless amount of color possibilities without ever "spoiling" the actual, original drawing. As I narrowed in on what worked best, I completed the illustrations. I once again printed and assembled the final pages into a "dummy" book and made adjustments where neccessary.
With the final drawings completed, I scanned in each page and moved on to the coloring stage. Using Adobe Photoshop, I first removed the under drawing of blue, leaving only the graphite visible. Next I began adding color, and was able to experiment with an endless amount of color possibilities without ever "spoiling" the actual, original drawing. As I narrowed in on what worked best, I completed the illustrations. I once again printed and assembled the final pages into a "dummy" book and made adjustments where neccessary.
